Monday, June 14, 2010

Laundry Room Upgrade - Part 3

Once the subfloor preparation was complete, it was time to get the tiling done.  I don't have much experience tiling, and the tiling that I have done has been pretty frustrating, but I had high hopes for this job.  After spending a lot of time getting the subfloor nice and flat I figured that this job would go smoothly.

Well, it did.  Mostly.  Before I started I had to run out to Home Hardware to get some tile edging.  Three pieces of 8' tile edging for $50.  Once I got home I pulled the two 50 pound bags of thinset mortar out of the car that I'd bought the other day.  Read the instructions to make sure I knew what I was doing and found that I'd bought the wrong thinset.  I had unmodified thinset, which the instructions said not to use with porcelain tiles - and I'm putting down 13" porcelain tiles.  Argh.  Back to Home Hardware to buy three bags of poly-modified thinset, which they only have in 25 pound bags for $20 each, vs the 50 pound bag of unmodified I got earlier for $16 each.  Double Argh.

After mixing up the thinset, I started laying tiles.  I mixed the first batch of thinset a little thick, but the remainder went down no problem.  I think this job ended up taking me three hours.  I could have gone faster if I had someone to help mix the mortar, but I'm glad I got it finished.


Here's the completed job - a nice smooth, unbroken floor (inspector Oscar checks it out).  Hmm, wasn't there a vent there somewhere.  Oops.


After the tiles dried for a couple of days I did the grouting.  Well, first I cut out two cracked tiles and the third tile that covered the vent.  The grouting took longer than I thought it would.  First, the grout we had was the color of, well, brown.  So of to Home Depot to pick up some new grout.  After getting started late (again), it took me about 45 minutes to put the grout down.  I cleaned up my tools and got back to the floor to sponge off the excess grout. 

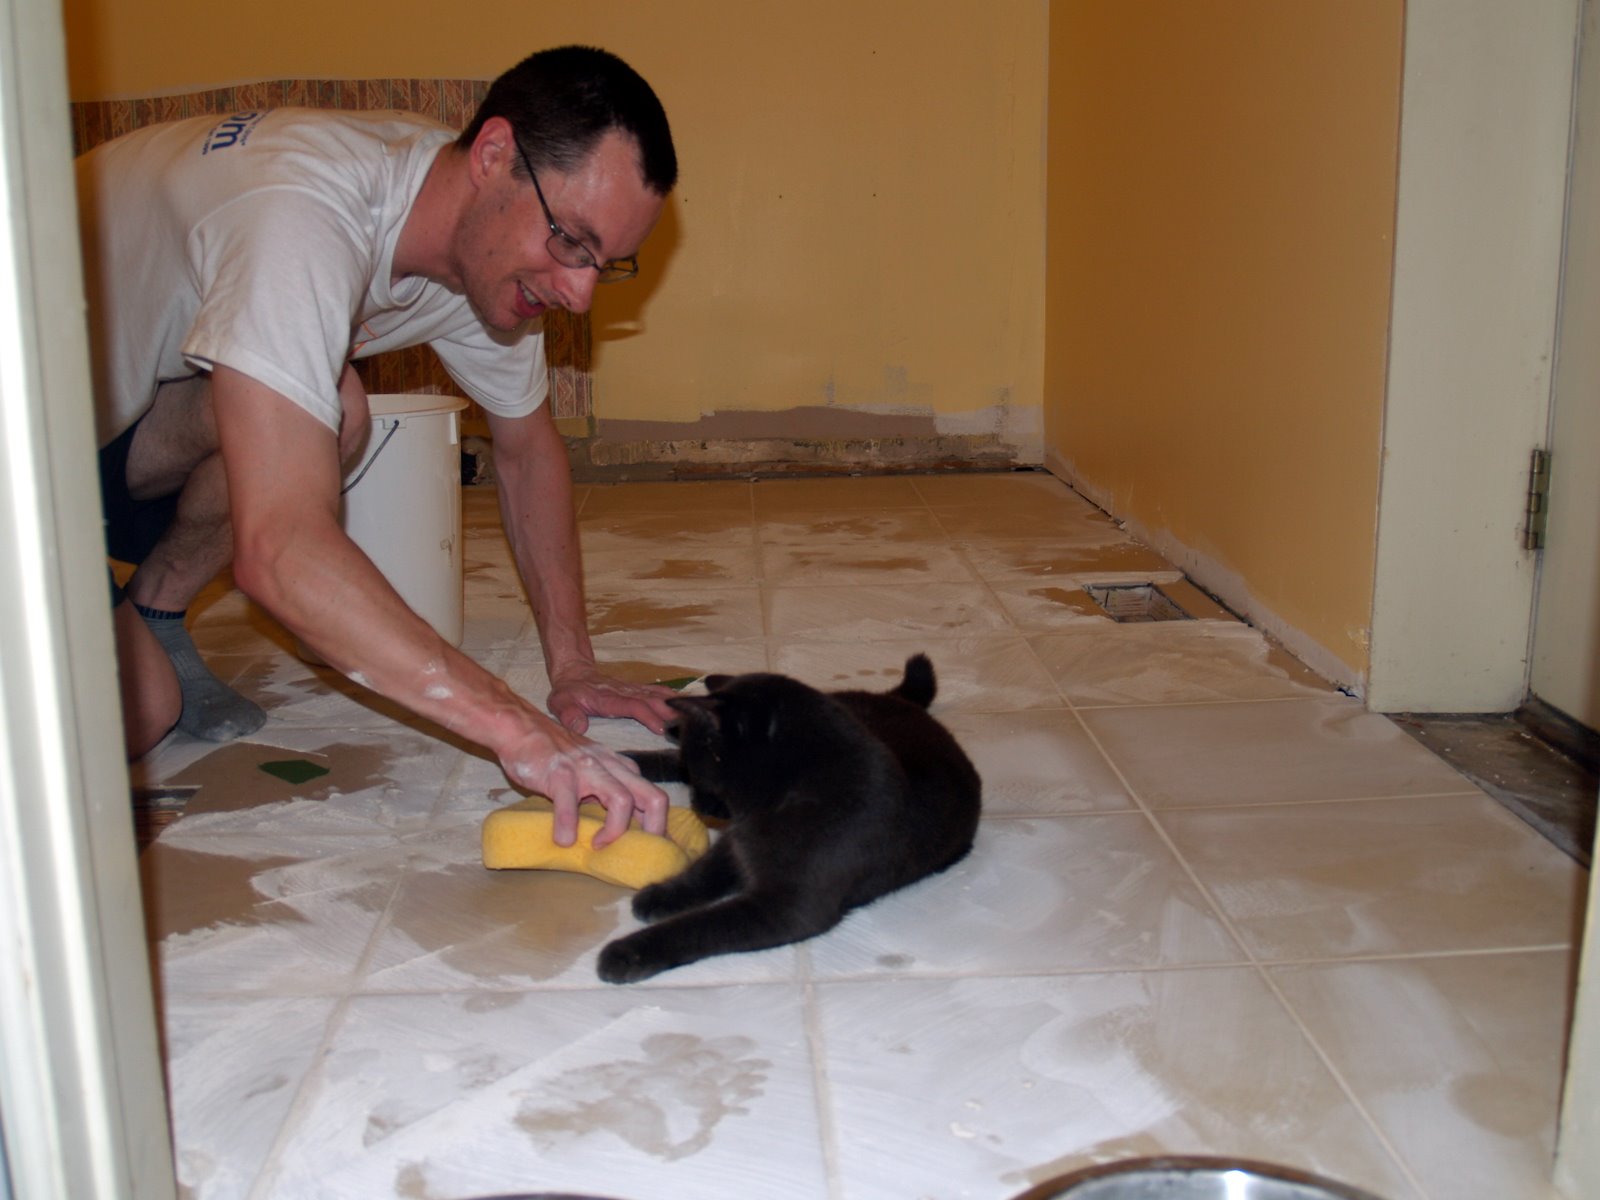
I must have waited too long to clean off the grout, because I had to scrub the floor for another hour and a half to get off all the grout.  That was the opposite of fun.  As you can see, inspector Oscar is always close at hand to make sure I am doing quality work.


Here's the completed floor.  I still need to make up a crawlspace cover.


Here's the new vent hole.  I tried plunge cutting the porcelain tile with a 4" diamond blade on an angle grinder but could not get the hole cut without breaking the tile.  After three tries I gave up and went with the below instead.

Friday, June 11, 2010

Laundry Room Upgrade - Part 2

After finishing up the drywall with four coats of drywall compound, I was ready to paint.  I started with a coat on all of the new drywall and any area that was patched.  The walls that were previously covered in wallpaper already had a good coat of primer so I left those alone.  There were a few brown spots on the ceiling where there were previously cabinets, so I primed those to cut down on the number of finish coats I'd need.  You can see one of the brown spots above my head in the picture below.


The floor was the next thing to tackle.  We'll be putting in a 13" porcelain tiles, so I need a strong, flat sub-floor to support the tile.  The original floor was : 3/4" tongue and groove planking (original), 1/2" particle board, two sheets of 1/4" plywood.  All fastened together with a bazillion nails.  I tried just ripping up the plywood and particle board, but it was coming up in fist size pieces due to all the nails.

After giving up on the 'easy' way of ripping out just the plywood, I pulled out my circular saw and sawzall and got to work.  First I used the circular saw (and a cheap blade) to cut through the floor adjacent to each stud.  Then, a large prybar and sledgehammer to pull the floor up far enough from the joist to cut the nails securing it to the joist.  A couple of hours, sweat and blood and I was able to get the floor removed and piled up outside the door.


Here is the naked floor.  A quick check with string showed me that it was bowed up to 1/2" in the middle.  I didn't want to impede on the floor space in the crawl below, so I decided to sister the 2x8 joists with some 2x6s in order to even out the floor.  With a string line stretched across the top of the existing joists to help line them up, I added a 2x6 to each of the original joists with construction adhesive and screws.  I had to notch the bottom of a couple of the 2x6s to clear wiring in the original joists.


After I finished flattening the floor, I put down two layers of 5/8" tongue and groove plywood for the subfloor - the first was glued and screwed to the joists, the second only screwed to the first layer.  On top of that I attached 3/8 fiberock with mortar and rink shanked nails.  Now the floor is ready for tile.

Thursday, June 10, 2010

Laundry Room Upgrade - Part 1

In our house, the Laundry Room and the Kitchen are the most dated and upgrade ready rooms in the house.  

The kitchen cupboards are 80's melamine with a mirrored backsplash and laminate counter tops.  The ceramic floor tiles are cracked and loose, the layout is too spread out and the walls are a dark brown.

The attached laundry room has ugly as heck wallpaper, awkwardly sized home made cabinets of dubious quality and a wavy vinyl floor.

This year's major house renovations will be to completely redo the kitchen and laundry rooms.  We'll start with the laundry room - once it is fixed up I'll setup a temporary sink in there and tear apart the kitchen.

First, a few before shots of the laundry room.  Nice wallpaper!


I had hoped to tear out the cabinets, strip out the wallpaper, the patch and paint the walls.  Unfortunately I found a surprise when I tore out the cabinets - part of the wall was cinder block.  The remainder of the wall was plaster directly attached to the cinder block which is beyond my skills to replicate.  Parts of the cinder block were on the same plane as the plaster in the adjacent wall (to the right) so there was no way I could just add drywall to cover the cinder blocks - I'd have to cover the entire wall with drywall.


Finishing drywall is definitely not a skill I've mastered very well so I knew this would be a bit of a challenge.  I called a guy who's done some other drywall work for me but he decided to retire from drywall earlier in the month so I was on my own.  I started by strapping the walls with some 1x3s, using construction adhesive and screws to attach the strapping to the plaster.

The ends of the 1x3 were attached to the cinder blocks with a powdered actuated fastener (Hilti DX 36).  I used cedar wedges to fur out the 1x3s on the cinder block so then lined up with the strapping on the plaster.


Once the strapping was in place, it was time to add the drywall.  Two sheets of 4x10 1/2" drywall covered this wall, I needed one other 4x8 sheet to cover up some plaster on the opposite wall.

I scoured the web for about an hour to brush up on my drywall finishing knowledge, here's a few sites I liked :

After the drywall was hung,  Joshua gave me a hand taping the joints.  I used paper tape for the flat seam and preformed metal corner beads for the corner and ceiling.


Here I am finishing up the first coat of mud.  It took me another three coats to get everything smooth enough.  Not a perfect job but good enough for the laundry room.  I definitely need to find (competent) help for the kitchen drywall job.