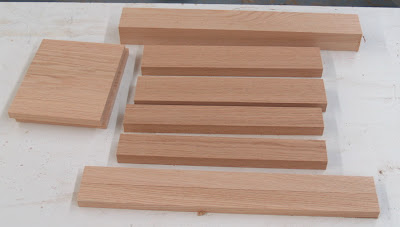
Monday, December 21, 2009

Kitchen Table - Part 3 - Finishing

This project is a big brother to the kids table I built for Joshua and Lauren earlier this year, so the finishing schedule is the same. After sanding all the parts 120-150-220 with a random orbital sander, I took them upstairs to my 'finishing room'.

I finished the table with two coats of Watco Danish Oil - Natural, following the directions on the can. I use scraps of an old t-shirt to apply the oil and wipe off the excess.

Once the oil has dried I'll apply two coats of Minwax Quick Drying polyurethane on the legs, apron and bottom of the table. I'll probably apply at least one extra coat on the top to give it a little extra protection.

Since it's winter time in the workshop and my heating situation is not so good in the workshop, I'll apply the top coats of poly in our heated house after I've moved the table in there.
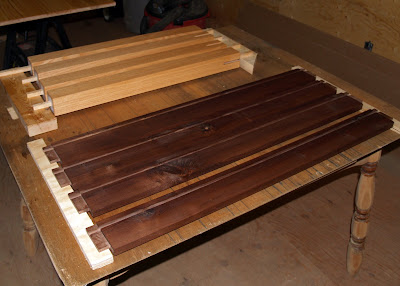


Once the bottom of the top and the legs/aprons were dry from the poly I glued up the legs and aprons.


After getting it down the stairs into my workshop - I realized that I needed a little extra support for the apron / leg connection. I added the corner braces, gluing and screwing them to the aprons. Around the inside of the apron, you can see the wooden buttons I used to secure to the top to the apron.


Wednesday, December 2, 2009

Kitchen Table - Part 2 - Top

It took a few tries to get everything right - but the top is finally glued up. The overall size is 48x48 inches.

I first glued up three sections, each about 16". After they dried I ran them through my drum sander to smooth them out.

Next I glued up two of the three sections, then after that was dry I added the third. I used biscuits to help line them up but the glue lines were still a little off. It's tricky working with these large panels. A better way to ensure they kept aligned would have been to use a tongue and groove joint. Maybe next time.


After the top was dry I used a saw guide and my circular saw to cut it square.


Lastly, a belt sander to get rid of the uneven glue lines, then random orbital sander with 80-120-180-220 sandpaper to smooth out the tabletop and all of the legs and aprons. I'm going to apply to finish to this project before gluing it up - so that's the next step.

Tuesday, December 1, 2009

Rosemary's Quilting

Rosemary finished up a new advent calendar just in time for the Christmas season. There are 25 pockets and each has a little treat inside for Joshua and Lauren. A couple of the pockets didn't seem very kid friendly so Rosemary replaced them with Peanuts characters instead.

It's nice to have a custom advent calendar instead of the $0.99 one from the grocery store filled with cheap chocolate.


Here's some more pictures of Rosemary and her sewing - she's only been sewing for a year but has made some really nice projects.

Here is her fancy Bernina Activa 220 sewing machine - made in Switzerland!


Rosemary working on her first quilt.


The first quilt - completed and hung up over our family room.


A nice little quilt to hang over Lauren's door.


Friday, November 27, 2009

Kitchen Table - Part 1 - Legs and Apron

After finishing off the Craftsman Ottoman, I wanted to do another 'quick' project before starting on Lauren's bed. I chose to replace our $50 kitchen table that we bought when we first got married with a bigger version of the kids table I build for Joshua earlier this year. It'll be a simple solid red oak top, walnut apron and red oak legs.

I started with the apron boards, milling the walnut to 3" x 7/8" x 46+". I left the pieces a little long so that I could have extra for testing the tenons. After milling the wood I stacked them and set them aside until I was ready to cut the tenons.


For the legs I decided to go with 2 1/2" square legs, made up of 4 mitre pieces. To keep waste to a minimum I made them up from boards that were around 8" in width, flipping them over after every mitre cut on the tablesaw. I used my planer sled to flatten the boards before cutting the mitres on the tablesaw.

I don't have a picture of the glue-up but it wasn't particularly tricky. Just use painter's tape to hold them together and a few clamps if the pieces need a little help lining up (mine did).


After the legs were all glued up, I moved over to the router table to cut the mortises in the top of the legs. I used a 3/8" spiral upcut bit for the mortises, so ripped a piece of scrap to 1 1/16" (2 1/2" - 3/8" = 2 1/8" divided by 2) to set the fence to center to mortise in the leg.


To cut the mortise I slide the leg in to the bit along the fence, which blasts the wood chips away from the leg. I setup my shop vac to catch the chips as the regular vac port on the fence doesn't catch any of these chips. A stop block clamped to the fence makes sure I don't cut the mortise to far down the leg.


The finished leg with mortises cut in two sides of each leg. The mortises cut right through the solid part of the leg into the hollow center. The tenons will be cut next and they'll be 7/8" thick to match the thickness of the leg parts.


Tuesday, November 24, 2009

Planer Sled

While I am in between 'big' projects, I decided to make a 'quick' kitchen table to replace our cheap table that we bought for $60 when we first got married 7 years ago. The top will be made up of solid panels, and the lumber I had for the top is not flat, so I need to flatten it before gluing up the top.

The boards are wide enough that I don't want to rip them all done to 6" to send them through the jointer for flattening. Since I lack any hand tools to flatten them the next easiest solution is the planer. I decided to make up a quick planer sled to run the boards through the planer and flatten them.

A planer sled supports the board you want to flatten as you pass it through the planer, causing the planer to only take off the 'high' spots on the board and flatten it out. If you send a cupped board through a planer, the planer will compress the 'cupping' of the board as it planes, taking off the 'high' and 'low' spots and not flattening the board, only reducing it's thickness. A planer sled will prevent the planer from compressing the 'cup' and force the planer to correctly flatten the board.

First - dig around the workshop and find a flat board that is wider and longer than the boards you want to flatten. I found a piece of melamine shelving that fit the bill. You will be fastening your boards to flatten to this flat piece and running them through the planer, so it has to be narrow enough to fit through your planer.

Next, glue, nail, screw or otherwise fasten a back onto one end of your flat board - this piece will keep the board you are flattening from sliding off the back of the sled.

Your sled is now complete - let's put it to use.


Now, place the board you want to flatten onto the sled and determine where you need to add support to the board. In the board below you can see I need support in the middle and on the left hand edge.


Now, flip the board over and add some gobs of glue from a hot glue gun. I made the gobs about 3/4" in diameter. Too much glue is better than not enough.

Flip the board back over before the glue dries and press it down in place on the planer sled. Wait a minute or two for the glue to dry, then you are ready to send the board through the planer. In the picture below you can see a bit of glue sticking out the side of the board.


Now, send the board through the planer. You can see in the picture below the planer is only removing material from the 'high' points on the board - the center of the board in this case. If I did not use a planer sled, the board would have been smooshed flat as it was sent through the planer, but then bounced back up when it came out the other end. Afterwards I would have a thinner, but still cupped board.


After a number of passes through the planer I have one side of the board flat. I can now flip the board over and run it through the planer to flatten the other side.


To separate the board from the sled, use a old chisel to pry it off, then use that same old chisel to pop off the gobs of glue. Obviously you'll want to remove that glue before sending your board back through the planer.


Thursday, November 19, 2009

Wood Delivery

Christmas came early for me this year.

Rosemary has requested a bed for Lauren and we decided that maple would be a good look for the bed. I called my lumber guy and he didn't have any hard maple, but his supplier had some kiln dried curly maple that he was going to pick up in a week or two, so I ordered up 100bf of the curly maple for the bed.

My lumber guy doesn't normally stock Quarter Sawn White Oak, but he had picked some up from his supplier and offered it to me for $0.25 more per foot than I was paying for the Red Oak. I jumped at the deal and ordered 120bf. I also asked him to bring along about $100 worth of Walnut and Poplar.

Before he came I spent a few hours cleaning and organizing the shop and making room in my wood pile. Turns out I hadn't made enough room, and had to clear out even more after he left to make room for all of it.

It was a piece of cake moving the lumber from his truck straight into the wood rack. It's great having a garage workshop with no cars in it!

On the ground is the is QWSO, 1st shelf is scraps, 2nd shelf KD curly maple, 3rd shelf QSWO and poplar, 4th shelf KD curly maple, 5th shelf red oak, top shelf walnut, cherry, poplar and scraps.


I randomly picked a QSWO board and curly maple and ran them through the jointer/planer to see what they looked like. The QSWO looks great and the curly maple will be perfect for Lauren's bed.


  • 100bf of KD curly maple, $300
  • 120bf of QSWO $450
  • 3 walnut boards, and 6 poplar $100
The QSWO is beautiful wood - air dried and very flat, average width 7 1/4". The curly maple is kiln dried and not as flat, so it will require a bit more work - average width 6".

Tuesday, November 10, 2009

Craftsman Ottoman - Complete

It's good to be done another project. The ottoman is off to the upholstery shop for them to complete the cushion - it'll be awhile but I'm in no hurry to try sewing it myself.

I used the same finish schedule that I've used on most of my red oak furniture. I apply one coat of Minwax Provincial Oil stain with a foam brush, wait 10-15 minutes then wipe off the excess with a clean cotton cloth (old t-shirt). Let it dry overnight, then wipe it down with another clean shirt the next day before applying the next coat, waiting 10-15 minutes and wiping it off.

Let it dry overnight, wipe it down again with a clean cloth, then apply Minwax Quick-drying oil polyurethane. Let it dry overnight, sand lightly with a synthetic wool pad, wipe it down with a clean cloth lightly dampened with mineral spirits. Apply one more coat of poly and it's done.


Here's a shot of my upstairs 'finishing room' over the workshop.


Here's the end product, next to the original.

Posted by Picasa

Monday, November 2, 2009

Craftsman Ottoman - Part 8

And.... it's done. Pretty much.

The last bit of cutting was to finish up the tenons on the lower stretchers. Once those were complete, a tiny bit more sanding then glue up the project.


Here is the completed chair, minus the plywood bottom for the cushion. On to the 'finishing room'. It'll get two coats of Minwax Provincial, then a few coats of Satin Polyurethane.


Start to 'before finishing' this project took somewhere between 8-10 hours. I used the following tools :
  • mitre saw
  • table saw
  • jointer
  • planer
  • router table and 3/8" spiral up cutting bit
  • drill press, 3/8" and 1/2" brad point bits
  • drum sander (could have also used random orbital sander)
  • random orbital sander
  • 1/2" chisel
The project used less than 10 bd feet of red oak which I already had. With all the straight cuts this is pretty easy project to do. The mortise and tenon joints are good practice for larger, more complex projects.

Friday, October 30, 2009

Craftsman Ottoman - Part 7

Now that all the parts are ready for assembly it's time to sand and glue this project. I used my random orbital sander to sand all the parts with 120 than 220 grit paper. Four or five passes on each side is usually enough to smooth them out. Another pass or two on each edge to round over
the sharp edges and then it's time for assembly.

Here is a dry fit before final gluing one of the sides to make sure everything will go together.


Finally, one of the sides glued up and waiting to dry. After assembly I found it was not quite square, but a little pressure from a diagonal clamp and it was good. Getting all the vertical slats glued and lined up was a little tricky but everything went together okay.


The long rails on the sides need a support on the inside. The cushion will rest on top of these supports when the stool is complete. I left out the screws called for in the plans and just glued these in place.


Once the glue dries on the sides and the long rails I'll be ready for final assembly.

Thursday, October 29, 2009

Craftsman Ottoman - Part 6

I used my Performax 16-32 Drum Sander for the first time on a 'real' project. The sixteen vertical slats of the Ottoman are 3/4" thick. I ripped them at about 7/8" from 3/4" stock, then ran all the pieces through the drum sander to remove the saw marks. In the past I've done this with a random orbital sander which is more time-consuming and less accurate. The drum sander worked great.

After sanding I cut the tenons on all the pieces to match the holes that I drilled in the rails. I then used a chisel to round over all tenons to match the round holes in the rails. You can see the one I've done in the picture below. It took about 30 minutes to round over all the tenons and do a little light sanding to remove the sharp edges.


Next up were the long rails. I cut the tenons the same as on the side rails, rounded over the edges with a chisel and did a quick dry fit to make sure they were okay.


The legs have a four-sided bevel on top. I used the mitre gauge with a stop block to cut the 15 degree bevel on the top of each leg.


Almost done now. Just the bottom stretchers left to cut and then sand and glue it up.


Wednesday, October 28, 2009

Craftsman Ottoman - Part 5

After cutting the mortises in the legs, it was time to cut the corresponding tenons in the top and bottom rails for the sides of the Ottoman. When I cut the top and bottom rails I kept some of the scrap wood from each rail, about 5" long so that I could use the scrap for test cuts. This way I could 'sneak up' on a tight fit for the mortise and tenon joint. If I raised the blade too far and the tenon was loose I just cut the end off the scrap and try again.

Each tenon is 1 1/4" in length, so I set the fence of the tablesaw at 1 1/8" to account for the thickness of the saw blade. The fence is set back from the start of the blade to prevent the wood from getting jammed between the fence and the blade. I have a Osborne EB3 Miter Gauge that I hold the rail against and then make the shoulder cuts on all four rails.


For the cheek cuts, I used a tenon jig that I created for my unifence. It's a simple jig that rides on top of the fence. The rail is held vertically against the stop and run through the blade to remove the outside of the tenon. The blade is raised up to a hair above the cheek cut and two passes are made for each rail end. As with the shoulder cuts, I first used the scrap stock to get the tenon width correct.


The last power tool step is to remove the edges of the tenon on the bandsaw. The mortises in the legs had rounded edges because I cut them with the router, so the last step needed to be done with hand tools. I used a chisel to round over the edges of the tenons so they fit snugly into the legs. A dry fit shows the ottoman is coming together.


The rails need mortises for the 8 slats in the sides. I decided to cut these with the drill press rather than making up a new jig. I clamped the rails together and marked the center point of the mortises.


Over to the drill press where I used a 1/2" brad point bit to drill out the 8 holes necessary for the slats.


Monday, October 26, 2009

Craftsman Ottoman - Part 4

The last time I made legs like these with mortises for the rails, I made up a custom jig for my router to cut the mortises. I used a 3/8 spiral bit and a template guide in the router. The jig worked well but was time-consuming to make and to use. Each mortise had to be cut in three steps - each cut deeper than the last. In between cuts I had to manually vacuum out the mortise as the dust collection attachment did not work with the template guide in my router. When switching legs I had to clamp and unclamp the template to each leg.

This time I decided to try using the router table and two stops to cut the mortises. By using the router table I could save the time of creating the jig, clamping the jig and cleaning out the mortises by hand.

I installed a 3/8" spiral bit in the router, then set the distance from the fence with a test piece to get the mortise centered in the 1 3/4" leg. I then clamped two stops on the fence to set the start and end of the mortise. After checking on a test piece I was ready to go.

First, I carefully marked all the legs to make sure I cut the mortises in the right place. With the router turned on I lowered each leg onto the bit, keeping the leg pressed tight against the fence, then moved the leg back and forth between the stops.

After cutting all four legs at the first depth I moved the router up to cut deeper and repeated the operation three more times until I had all legs cut to the full 1 1/4" depth.


This 3/8" Up Spiral Router Bit has cut a lot of wood and needs to be replaced or sharpened.


The first mortises I cut were for the bottom rails, 1 1/4" in length.


Each leg got three mortises cut. I was all four legs after about 45 minutes. It was much easier to cut the mortises on the router table than to make a custom jig.

Friday, October 23, 2009

Craftsman Ottoman - Part 3

A little bit more progress on the Craftsman Ottoman.

After removing the legs from the clamps, I ran them through the tablesaw to cut off the excess veneer. The finished size of the legs is 1 3/4", but I since they are glued up out of 1" boards, I had plenty of stock to remove after gluing. When I glued the veneer I had both pieces overhang one edge so the other edge would remain square.

After the tablesaw I ran them through the planer and trimmed them all down to 1 3/4" square.


I am very pleased how they turned out. The veneer will hardly be noticeable once I ease the edges.


I also dug through the wood pile to find wood for the rest of the parts I needed. I jointed, ripped, planed and crosscut all the parts to size. The wide board on the left will be the spindles.


I need two more parts - the shelf and the shelf supports.

The last thing I did was setup my router table to start cutting the mortises in the legs. I'll get that done next, then cut the tenons on the rails with the tablesaw.