The top of the mailbox came back from my engraver today. I supplied him with a Corel file of the artwork and he used a laser engraver to cut the art in the picture above. The letters are cut about 3/32" deep.
The masking tape is on for the engraving process and he leaves it on in case I want to stain / paint the letters a different colour. In this case I'll be staining the whole piece the same colour so I'll remove the tape before starting. Since the laser leaves the letters a bit dark they should be nicely defined in the end result.
I also picked up a set of hinges from the local hardware store. Next I'll chisel out mortises for the hinges then stain the piece.
A blog to show my latest woodworking and home renovation projects. Some running posts may be snuck in as well.
Tuesday, June 30, 2009
Playhouse Rocketship - Part 8
It was quite a struggle to get it done, but I managed to get half of the rocket covered. I had picked up two cargo strap clamps to get the wood home on top of my car and I'm glad I did as they came in very handy to clamp the outer skin in place. I used up most of the rest of my clamp collection to lock it in place and I'll let it dry overnight.
After all the hard work was done Lauren and Joshua came out to inspect my work. Joshua also helped clean up the workshop a little which is always appreciated. Though it was going to be a surprise for Joshua, I ended up telling him about it since it was past his birthday anyways. He is climbed inside to check it out and is looking forward to the completed project.
Lastly I measured and cut the other half of the outer skin, then used a roto-zip tool (actually a really cheap imitation) to cut a door and a few windows. After the cutting was done I glued up some plywood ribs to the outer edges to stiffen it up for gluing.
Monday, June 29, 2009
Playhouse Rocketship - Part 7
The rocketship will be wrapped in 1/8 hardboard which is brown on one side and some sort of durable white finish on the other. This saves me from having to paint it. It's also really cheap at less than $10 per 4x8 sheet.
Each half of the rocketship will get it's own covering, so I started off with a 5' long, 43" high piece to wrap around half of the rocket. After struggling with bar clamps, quick clamps and some tie-down clamps for about 45 minutes, I realized I need to add some support to the edges of the hardboard. It will be secured at three points on the internal structure and the edges in between the rings that were free floating were bowing outwards too much. After much head scratching I realized that I could glue up some 3/4" plywood supports to the very edges of the hardboard to stiffen them up. I used a good glue to make sure they stayed (Titebond III) and pinned them in place before clamping them down to dry.
Lastly I finished up the rocket motors with a second coat of black paint.
Building a Birdhouse
I've been wanting to build a birdhouse with Joshua for awhile but I've been waiting to get some inexpensive pine from Home Depot to do it. They sell 1x12x8 pine for less than $10. Even though it is full of knots, it's great wood for simple kids projects. It is soft and easy to work with and will take paint well.
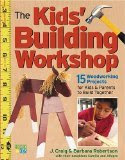
I used the plans from the book "The Kids' Building Workshop". The plans used cedar shakes but the pine was an easy substitute - I did have to trim up the roof a bit to get it to fit properly.
To start with, we rough cut the 1x12 in half, then ripped the half to get 2-1x6x4s. When working with Joshua in the workshop, I've got a milk crate that he stands on to watch when I am working with the jointer, tablesaw or mitresaw. I place it in a safe location then he stands on it until I am done with the tool. For these tools, his job is to turn on and off the dust collector before/after the tool is turned on.
After the rough cutting we used the planer to plane down one of the 1x6s to 1/2" for the roof, the other to 3/4" for the remainder of the pieces. Joshua is allowed to help with the planer, he feeds to pieces in and I catch them at the other side. We usually open up the garage door and let the chips fly, then it's easy to scoop them up and dump them in a garbage can when we are done.
Joshua went back on the milkcrate as I used the jointer to clean up one edge before heading to the tablesaw to rip the pieces to width. Next the mitre saw to cut out the individual pieces.
Over to the drill press, Joshua drilled out the hole for the entrance, then the small hole to hold the entrance perch. You can see in the video below about 1:40 what happens when you don't keep a good hold on the drill press handle - I think I need to get him a bit higher stool for the drill press.
Lastly I clamped the pieces together and started the nails, then Joshua finished them off. We screwed the bottom in so it is removable and now some lucky bird will soon have a nice new home to live in. We'll give the outside a coat or two of paint or stain before we hang this up.
This was the first birdhouse I've ever built - I'm pretty sure I'll be building plenty more. Though maybe we'll do a bat house next...
Friday, June 26, 2009
Playhouse Rocketship - Part 6
A few days ago I gave up on the idea of getting this done for Joshua's Birthday. I was planning to take a day of this week to finish it up, but I had to take the day off to watch him as school ended one day earlier for him than Rosemary. I'll have to start earlier next year...
I glued up the circular ribs for the rocketship. The outer panels will be glued to these ribs. They are made up in four parts and each half is glued together, than secured to the other half with 1 1/4" wood screws. If I had the inclination, bolts would have been better, but assembly shouldn't have to happen very often - just to bring it into the house.
I originally planed to use the router and a straight cutting bit to trim down the ribs so that the circle pieces would all be on the same plane but gave up on that idea after trying it on some scrap - maybe next time. I used the larger circle as a template, stacked the pieces then glued and screwed two joints and screwed the other two to get a full circle. After doing this twice I had my two rib circles.
The circular ribs will be supported by some vertical ribs that will be attached to the bottom circles. I cut up three vertical ribs, one 3/4" longer than the other two. The longer piece was secured to the bottom circle, then I cut a recess in the top circle of plywood to slide it into place. Next the other two vertical ribs were glued and screwed to the top circle. My pin nailer made all of this much easier - pin the pieces in place then drill the countersink and screw them down. In the photo below you can see the cutout in the bottom plywood for the closes vertical rib.
Next I stacked up the circular ribs, adding another layer of vertical ones in between. The idea is that each circular rib half is connected to one of the circles on the bottom. The sides of the rocket will be secured to one half of the circular rib and the adjoining circle on the bottom. The circular ribs can be unscrewed and the rocket can be divided into two for transport. Since it is slightly larger than 40" it won't fit through a doorway unless this is done.
One coat of black paint on the rocket engines - looks good to me!
Wednesday, June 24, 2009
Playhouse Rocketship - Part 5
Early in the evening, Lauren took a quick trip out to the workshop with me and I glued up the rocket motor blanks while she played with some scrap wood and sawdust. Too bad the camera batteries died before I could get her picture :(
Later that night I finished cutting out all the quarters that will form the ribs of the rocket. The process went like this :
Lastly I put a coat of primer onto the rocket motors using a disposable foam brush. I'm tired of cleaning brushes.
Later that night I finished cutting out all the quarters that will form the ribs of the rocket. The process went like this :
- trace master template onto plywood
- rough cut blank from plywood with jigsaw or bandsaw
- use pin nailer to attach two blanks, then pin the master template onto the top blank
- use bandsaw to get with 1/8-1/16 of the template
- over to the router to use a straight cutting bit with a bearing guide to cut right to the template
- disassemble and remove pins with pliers
Lastly I put a coat of primer onto the rocket motors using a disposable foam brush. I'm tired of cleaning brushes.
Friday, June 19, 2009
Playhouse Rocketship - Part 4
A few things done but it looks like time is running low on this project. Hopefully I'll scrape together some time to get things done this weekend.
I had some other painting to do, so all I got done were two more 'quarters' for the ribs of the rocket ship. I stacked two up with the template and ran both through the bandsaw and router at the same time - this will save me a bit of time as I've got 12 total to do and only 3 done!
Lastly I finished up the 6" circles that will be the top of the rocket engines. Here's what the finished rocket engine will look like. Still debating whether or not they should be painted - Rosemary votes no.
It was a good time in the workshop as nothing bit me :)
Thursday, June 18, 2009
Playhouse Rocketship - Part 3
Today I finished cutting up the last two blanks for the rocket motor circles. I've still got one more set of circles to make up (6") but I haven't glued up those blanks yet. I'll get that done today.
After finishing the cutting I moved over to my oscillating spindle sander and smoothed out all of the circles. The Ridgid OSS is a great tool and the dust collection is fine for me. I used the belt attachment to round out the circles.
The circle jig I made up the other day for the band saw works reasonably well, but the flex in the blade means the circles are not perfect. The OSS got them close enough for my rocket motors. If I need perfect circles I think I'd use the router to cut them instead. For this project perfection is not needed - it's not rocket science, it's rocket woodworking!
The next thing to work on were the plywood bottoms for the rocket. These 40" diameter circles were a snap to cut on the circle jig. I first used the tablesaw to carve up two 41x41 squares, then over to the bandsaw to cut the circle out. Lastly I lined the circles up with their center holes and cleaned up the edges with the bandsaw. These two will form the base of the rocketship playouse, resting on top of the rocket motors.
After finishing the cutting I moved over to my oscillating spindle sander and smoothed out all of the circles. The Ridgid OSS is a great tool and the dust collection is fine for me. I used the belt attachment to round out the circles.
The circle jig I made up the other day for the band saw works reasonably well, but the flex in the blade means the circles are not perfect. The OSS got them close enough for my rocket motors. If I need perfect circles I think I'd use the router to cut them instead. For this project perfection is not needed - it's not rocket science, it's rocket woodworking!
After the OSS it was over to the router table and a 1/4" round over bit with a guide bearing to smooth out the edges. In retrospect I probably have only done one side of the motor, but I don't think Joshua will complain.
The next thing to work on were the plywood bottoms for the rocket. These 40" diameter circles were a snap to cut on the circle jig. I first used the tablesaw to carve up two 41x41 squares, then over to the bandsaw to cut the circle out. Lastly I lined the circles up with their center holes and cleaned up the edges with the bandsaw. These two will form the base of the rocketship playouse, resting on top of the rocket motors.
Next I need 3 hollow circles to support the shell of the rocket. Two for the main body and one for the bottom of the nose cone. Rather than wasting 1.5 sheets of plywood I decided to cut quarter circles out of one sheet and glue them up to form the circles. They should be plenty strong enough for this playouse.
First I made up a template for the quarters with some scrap 3/8" plywood. I used the bandsaw circle jig to cut the quarter circle template at the same diameter as the bottoms (40"). I cut the radius by 3" to cut the inner part of the template, making the template 3" thick. The template ended up being 32" in width as I left about 3" on each side for an overlap.
I used that template to mark out blanks on a 33"x8' sheet of plywood then cut them out with a jig saw. After tacking the template to the blank with a pin nailer I cut down to within 1/8" of the line on the bandsaw.
Finally, over to the router table with a guide bit to trim the blank to the same size as the template. I was only able to finish one piece, but I've got the process down so the others should go quickly.
The last thing I did was glue up blanks for the 6" circles for the rocket motors.
Caution : OSS' bites just like the bandsaw :
Wednesday, June 17, 2009
Playhouse Rocketship - Part 2
I was almost out of time after making up the bandsaw circle cutting jig.
I unclamped all the blanks I had glued up for the rocket motors, used a chisel to remove the excess glue and then used a belt sander to clean them up a little. Next I used the sliding miter saw to cross cut one edge straight, measured over for the center hole and drilled it for a finish nail to use the with circle cutting jig.
Lastly, over to the bandsaw to cut the circle. They'll still need a bit of sanding on the edges, I'll use the oscillating spindle sander for that. I got about half of them done. Here's one - there's one more smaller circle to go on top.
Caution - Bandsaws Bite!
Bandsaw Circle Cutting Jig
As I posted yesterday, the next thing I needed to do for my rocketship project was to build a circle cutting jig for the bandsaw and router. I figure they'd take about the same time to build, but the bandsaw will cut quicker than the router, so I decided to start with that one and see if the router is required or now.
In the Google 3D Warehouse, you can find a sketchup model of this jig.
Very easy to build.
First, find some 3/4" plywood and cut it a few inches larger than the width of your bandsaw table. In my case, 17". It'll be easier on you if the piece is squared up, so do that before going on.
You'll need to attach a couple of supports to the plywood that you will use to clamp the table in place. See the locations in the picture or the sketchup model. Make sure they are parallel to the edges of the plywood. I found it easiest to use a pin nailer to hold the pieces in place before I flipped the table over and counter sunk some screws in to hold them permanently. I didn't bother gluing them in place, the screws will be enough to hold them.
Next, clamp the table in place on your bandsaw, and either cut some 2xs to use as legs or use an adjustable height stand to provide support at the far end of the table. You are almost done.
Draw a line perpendicular to the center of the blade, parallel to the edge of the table. This will mark the center of your circle.
Now start cutting - almost. Measure out from the blade half the diameter of your circle and drill a hole on the line matching the size of a finish nail you've got lying around the shop. Drill a similar hole in your circle blank. Drill the hole half the diameter of the circle from the edge of the blank - you'll put the nail in the blank so that it is sticking out of the blank, then put that into the hole in the jig table. Your wood blank should just rest against the bandsaw blade. Turn the bandsaw on and spin your blank around and you've got your circle.
Tuesday, June 16, 2009
Playhouse Rocketship - Part 1
Joshua's birthday is in about a week and I decided a few days ago that I'd build him a rocketship playhouse for his birthday. One of his favourite things to do right now is to play in a little IKEA KOJA tent. He is always asking for one of us to go in the tent with him.
His little sister Lauren and Oscar the cat both like playing in the tent as well. Hopefully they'll all like the new rocketship.
With a little more than a week to go I'm not sure if I'll get this one done. Maybe the time crunch will be a good thing and force me to finish this project off in a reasonable amount of time.
First I drew up a quick plan in Sketchup :
Using Sketchup, I haven't been able to figure out how to cut the door out of the cylinder. It'll be easier to cut the hole in the wood :)
For the cylinder and cone I'll use some 1/8 masonite, white on one side and brown on the other. This'll save me from having to paint it. The floor and support rings will be out of 3/4" good one side plywood and the rocket motors are from leftover dimensional lumber.
I picked up the plywood last night and stacked it in the shop. Next I scrounged up some leftover dimensional lumber and glued up almost enough blanks for the rocket motors. I managed to use up all the Bessey clamps in the shop - does that mean I can buy some more?
Next up - a circle cutting jig for rotor and bandsaw table.
Friday, June 12, 2009
Craftsman Mailbox - Step 4
The mailbox is shaping up nicely. After a quick coat of stain (Minwax Provincial) on the bottom panel which will be floating, I glued up the mailbox.
I cut 1.5" off the solid top and glued it on top of the mailbox. This way when the mailbox is opened there will be sufficient angle in the top to lean against the house while the mailbox is filled or emptied.
I dropped the top off at a local engraver who will laser engrave 'Post' into the top. Once I get it back I'll stain and finish the piece. I still haven't picked out the hinges yet - I'll get some the next time I hit a hardware store.
Here's the image that I gave him to engrave :
Thursday, June 11, 2009
Craftsman Mailbox - Step 3
This project is moving a bit slowly as any time the sun is shining I am out painting the house. In any case, I've got the front glued up.
I did a two part glue up, on the first operation I left out the two middle horizontal rails, I did put them in place to help align the pieces.
In regards to joinery, there are many good ways to join the vertical styles to the horizontal rails. Mortise and tenon, dowels or dominos are a few. I had every intention of using dowels. I even drilled a few holes. I used dowel centers to mark the matching holes but try as I might was unable to get the parts to line up. After several tries I gave up. Maybe next time I'll have a dowel jig. For now I just butted them up and glued them. I used good glue (Titebond III) so hopefully it'll stay together.
After the first glue-up had dried, I sanded the piece flush, cut the dado for the bottom then glued in the middle rails.
For the rest of the mailbox I cut the dado in the back and sides, trimmed the sides at a 13 degree angle, then planed down the bottom shelf to fit in the dado. Last I sanded everything to 120 with a random orbit sander.
Subscribe to:
Posts (Atom)