Showing posts with label Joshua. Show all posts

Tuesday, September 15, 2009

Joshua's First Day of School

Joshua was very excited on his first day of Junior Kindergarten. He rode the bus all by himself with his backpack and Spiderman lunchbox.


Tuesday, September 8, 2009

Wooden Inukshuk

The Detroit Zoo, Toledo Zoo, our neighbour's garden, Chickadee magazine, the 2010 Winter Games. We've been seeing inukshuks everywhere and Joshua has taken a real liking to them.

Rosemary tried to put one together a few days ago with him out of rocks we had around the backyard but his sister was determined to knock it over as soon as two rocks were piled on top of one another.

Joshua asked me today to build up a inukshuk out of the blocks we have, but since it was during his sister's nap time I thought it would be a good excuse for us to play together in the workshop.

We dug through the scrap pile and found some leftover construction lumber from still unfinished rocketship playhouse and got started!

The wood was severely cupped (probably why I never used it) so we ran it through the sander to get a flat face, then the planer to flatten the other side.

Next it was over to the bandsaw to cut out the different parts. I tried having Joshua draw the parts to cut but that was too cumbersome so I just had him tell me what size to make and I cut it out. I curved all the sides so they looked more like rocks and we built it up until it was about a foot high.

I tried to convince him to leave in pieces so he could build and rebuild, but he wanted to glue it so that's what we did. Over to his workbench where we glued it up then clamped it up.

Here's Joshua removing the clamp a few hours later after the glue had dried.


Here's Joshua with his finished (?) product. He did some sanding with the sponge he's holding and he's asked to paint it as well. If he asks again tomorrow I'll get out some paint for him.


This was a fun and easy project for us to do together. The most time consuming part was running the boards through the sander. I think we finished it up in about 1.25hrs.

Thursday, September 3, 2009

Workshop Visitors

My parents recently picked up a new camping trailer and needed to add some drawers to provide some more storage. They came over to my workshop and I gave them a hand putting some drawers together.

They were using AC plywood for the drawer sides, with one good side, we ran the 'C' side through my new sander to smooth them out a little. Joshua came out to catch the wood pieces. The sander worked great and the dust collection is excellent.


Rosemary and Lauren stopped by to check on our progress as well.


The drawers were just simple boxes, pocket screwed, glued with a 1/8" hardboard bottom. Unfortunately I did not have enough pocket screws so we could only finish two out of 7 drawers. The rest my Dad will finish up at home after they pick up some pocket screws.

With the 1/2" plywood we need 1" pocket screws. I had a jar of pocket screws that I'd picked up awhile ago - it was labeled 1" screws but full of 1 1/4" screws - argh!

Wednesday, August 26, 2009

Water Bottle Rocket

A couple of weeks ago we saw the episode of 'Ask This Old House' where they build 3 projects for kids - a garden, indoor putt-putt course and a water rocket. They've got an article on their site about how to build the rocket and some other family friendly projects.

The guy they had on the show to demonstrate how to build a rocket has his own website at http://www.sciencetoymaker.org, and you can also check out his original plan on how to build a water rocket. He's got step by step videos on what to do, a materials list and launching tips. That's where we went to get our plans.

After raiding a couple of recycling bins for 2 litre pop bottles, we headed out to Home Depot to pick up the PVC pipe needed for the rocket launcher. Unfortunately the one near me does not stock it. Next we tried Canadian Tire - Bingo. Well, almost. I didn't realize it at the time but I bought CPVC instead of PVC and the instructions specifically call for PVC. In the materials list which I had printed out and brought with me it says 'PVC--not CPVC!--plastic pipe', unfortunately I somehow missed that.

When it came time to put the launcher together, the CPVC has a smaller diameter than PVC and the bottle does not fit as well. To seal the bottle to the tube, you use a candle to heat and expand the tube. This turned out to be the most difficult part with the CPVC, I assume it is much easier with PVC which does not require as much expansion.

In any case I eventually got it to seal after wrecking a few feet of the CPVC, and wrapping the expanding section in teflon tape. I also had to cut down the outside of the tire valve to get it to fit within the CPVC cap and the hose clamp I had on hand to secure the cable ties was just big enough to squeeze over the ties.

After much fiddling around it is now working well. We've probably launched it 30-40 times and it's great fun. Both Lauren and Joshua love it and so have the other kids that have been over to see it. I'll probably build another one out of PVC as the bottle seal on the launcher leaks on me for every launch, but until then we'll be launching this one.


Joshua drilling the end cap for the tire valve


Our first successful launch


Getting ready for the next launch

Thursday, August 20, 2009

Hammer Peg Toy - Part 1

Someone posted a picture on Sawmill Creek the other day of a hammer peg toy that he'd made for his grandchildren. He said that the both the young and old kids loved it and I figured it was high time I made one up for my two kids.

Joshua came out to the workshop to help me with this one. First we dug through the wood pile to find a piece of walnut to form the bench after running it through the jointer, tablesaw and planer it was ready to get drilled.

I consider the drill press a pretty safe tool and Joshua has used it in the past. I set up the fence and clamp the piece in place and let him do the rest. He put 10 1/2" holes in this bench piece.


Though Joshua likes drilling holes, the other thing he really likes is cleaning up. Well, using the shop-vac anyways. The Fein Turbo II does a great job cleaning up around the shop, it's reasonably quiet and the additional 1 micron filter and bag kit make it pretty safe to use. The auto-start works great for sanding with my random orbital sander.


I found a small piece of cherry to cut up for the bench ends, and ran them through the 3/8" spiral cutter I already had on the router table to cut the dado for the bench. Next I put the bench back through the planer to size it for the dado.


After a quick dry-fit and a little bit of sanding we added glue and clamped it up to dry.


Though Joshua will no doubt get some use out of the bench, it's really for his baby sister. Lauren came out to test the bench out. I cut a few dowels for her test. I think she likes it! The mallet head is made from some scrap 1" dowel I had left over from another project, a half inch hole drilled in it then a 1/2" dowel glued into the hole for a handle.


I'll finish up the project with a coat of Watco Danish Oil, cut the rest of the pegs and smooth out the sharp edges, then turn it over to Lauren and Joshua.

Thursday, July 30, 2009

Quack! Quack!

Joshua and I spent a bit of time in the workshop while Mommy was out with Lauren. First we cut an ugly looking lopsided 'tennis racket' out of some 3/8" plywood on the bandsaw, then over to the scroll saw to cut up some scrap pine.


I drew up a quick duck on the pine and cut it into a little jigsaw puzzle. Both Joshua and Lauren like playing with it. It was first the jigsaw puzzle I've made - Joshua is now asking for a tractor or elephant jigsaw puzzle.

Monday, June 29, 2009

Building a Birdhouse


I've been wanting to build a birdhouse with Joshua for awhile but I've been waiting to get some inexpensive pine from Home Depot to do it. They sell 1x12x8 pine for less than $10. Even though it is full of knots, it's great wood for simple kids projects. It is soft and easy to work with and will take paint well.

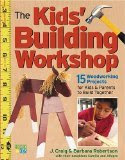
I used the plans from the book "The Kids' Building Workshop". The plans used cedar shakes but the pine was an easy substitute - I did have to trim up the roof a bit to get it to fit properly.

To start with, we rough cut the 1x12 in half, then ripped the half to get 2-1x6x4s. When working with Joshua in the workshop, I've got a milk crate that he stands on to watch when I am working with the jointer, tablesaw or mitresaw. I place it in a safe location then he stands on it until I am done with the tool. For these tools, his job is to turn on and off the dust collector before/after the tool is turned on.

After the rough cutting we used the planer to plane down one of the 1x6s to 1/2" for the roof, the other to 3/4" for the remainder of the pieces. Joshua is allowed to help with the planer, he feeds to pieces in and I catch them at the other side. We usually open up the garage door and let the chips fly, then it's easy to scoop them up and dump them in a garbage can when we are done.

Joshua went back on the milkcrate as I used the jointer to clean up one edge before heading to the tablesaw to rip the pieces to width. Next the mitre saw to cut out the individual pieces.

Over to the drill press, Joshua drilled out the hole for the entrance, then the small hole to hold the entrance perch. You can see in the video below about 1:40 what happens when you don't keep a good hold on the drill press handle - I think I need to get him a bit higher stool for the drill press.


Lastly I clamped the pieces together and started the nails, then Joshua finished them off. We screwed the bottom in so it is removable and now some lucky bird will soon have a nice new home to live in. We'll give the outside a coat or two of paint or stain before we hang this up.

This was the first birdhouse I've ever built - I'm pretty sure I'll be building plenty more. Though maybe we'll do a bat house next...