Tuesday, June 30, 2009

Craftsman Mailbox - Step 4.5

The top of the mailbox came back from my engraver today. I supplied him with a Corel file of the artwork and he used a laser engraver to cut the art in the picture above. The letters are cut about 3/32" deep.

The masking tape is on for the engraving process and he leaves it on in case I want to stain / paint the letters a different colour. In this case I'll be staining the whole piece the same colour so I'll remove the tape before starting. Since the laser leaves the letters a bit dark they should be nicely defined in the end result.

I also picked up a set of hinges from the local hardware store. Next I'll chisel out mortises for the hinges then stain the piece.

Playhouse Rocketship - Part 8

It was quite a struggle to get it done, but I managed to get half of the rocket covered. I had picked up two cargo strap clamps to get the wood home on top of my car and I'm glad I did as they came in very handy to clamp the outer skin in place. I used up most of the rest of my clamp collection to lock it in place and I'll let it dry overnight.


After all the hard work was done Lauren and Joshua came out to inspect my work. Joshua also helped clean up the workshop a little which is always appreciated. Though it was going to be a surprise for Joshua, I ended up telling him about it since it was past his birthday anyways. He is climbed inside to check it out and is looking forward to the completed project.


Lastly I measured and cut the other half of the outer skin, then used a roto-zip tool (actually a really cheap imitation) to cut a door and a few windows. After the cutting was done I glued up some plywood ribs to the outer edges to stiffen it up for gluing.

Monday, June 29, 2009

Playhouse Rocketship - Part 7

The rocketship will be wrapped in 1/8 hardboard which is brown on one side and some sort of durable white finish on the other. This saves me from having to paint it. It's also really cheap at less than $10 per 4x8 sheet.

Each half of the rocketship will get it's own covering, so I started off with a 5' long, 43" high piece to wrap around half of the rocket. After struggling with bar clamps, quick clamps and some tie-down clamps for about 45 minutes, I realized I need to add some support to the edges of the hardboard. It will be secured at three points on the internal structure and the edges in between the rings that were free floating were bowing outwards too much. After much head scratching I realized that I could glue up some 3/4" plywood supports to the very edges of the hardboard to stiffen them up. I used a good glue to make sure they stayed (Titebond III) and pinned them in place before clamping them down to dry.


Lastly I finished up the rocket motors with a second coat of black paint.

Building a Birdhouse


I've been wanting to build a birdhouse with Joshua for awhile but I've been waiting to get some inexpensive pine from Home Depot to do it. They sell 1x12x8 pine for less than $10. Even though it is full of knots, it's great wood for simple kids projects. It is soft and easy to work with and will take paint well.

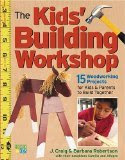
I used the plans from the book "The Kids' Building Workshop". The plans used cedar shakes but the pine was an easy substitute - I did have to trim up the roof a bit to get it to fit properly.

To start with, we rough cut the 1x12 in half, then ripped the half to get 2-1x6x4s. When working with Joshua in the workshop, I've got a milk crate that he stands on to watch when I am working with the jointer, tablesaw or mitresaw. I place it in a safe location then he stands on it until I am done with the tool. For these tools, his job is to turn on and off the dust collector before/after the tool is turned on.

After the rough cutting we used the planer to plane down one of the 1x6s to 1/2" for the roof, the other to 3/4" for the remainder of the pieces. Joshua is allowed to help with the planer, he feeds to pieces in and I catch them at the other side. We usually open up the garage door and let the chips fly, then it's easy to scoop them up and dump them in a garbage can when we are done.

Joshua went back on the milkcrate as I used the jointer to clean up one edge before heading to the tablesaw to rip the pieces to width. Next the mitre saw to cut out the individual pieces.

Over to the drill press, Joshua drilled out the hole for the entrance, then the small hole to hold the entrance perch. You can see in the video below about 1:40 what happens when you don't keep a good hold on the drill press handle - I think I need to get him a bit higher stool for the drill press.


Lastly I clamped the pieces together and started the nails, then Joshua finished them off. We screwed the bottom in so it is removable and now some lucky bird will soon have a nice new home to live in. We'll give the outside a coat or two of paint or stain before we hang this up.

This was the first birdhouse I've ever built - I'm pretty sure I'll be building plenty more. Though maybe we'll do a bat house next...
Friday, June 26, 2009

Playhouse Rocketship - Part 6

A few days ago I gave up on the idea of getting this done for Joshua's Birthday. I was planning to take a day of this week to finish it up, but I had to take the day off to watch him as school ended one day earlier for him than Rosemary. I'll have to start earlier next year...

I glued up the circular ribs for the rocketship. The outer panels will be glued to these ribs. They are made up in four parts and each half is glued together, than secured to the other half with 1 1/4" wood screws. If I had the inclination, bolts would have been better, but assembly shouldn't have to happen very often - just to bring it into the house.

I originally planed to use the router and a straight cutting bit to trim down the ribs so that the circle pieces would all be on the same plane but gave up on that idea after trying it on some scrap - maybe next time. I used the larger circle as a template, stacked the pieces then glued and screwed two joints and screwed the other two to get a full circle. After doing this twice I had my two rib circles.


The circular ribs will be supported by some vertical ribs that will be attached to the bottom circles. I cut up three vertical ribs, one 3/4" longer than the other two. The longer piece was secured to the bottom circle, then I cut a recess in the top circle of plywood to slide it into place. Next the other two vertical ribs were glued and screwed to the top circle. My pin nailer made all of this much easier - pin the pieces in place then drill the countersink and screw them down. In the photo below you can see the cutout in the bottom plywood for the closes vertical rib.


Next I stacked up the circular ribs, adding another layer of vertical ones in between. The idea is that each circular rib half is connected to one of the circles on the bottom. The sides of the rocket will be secured to one half of the circular rib and the adjoining circle on the bottom. The circular ribs can be unscrewed and the rocket can be divided into two for transport. Since it is slightly larger than 40" it won't fit through a doorway unless this is done.


One coat of black paint on the rocket engines - looks good to me!