Wednesday, November 16, 2016

Doorbell Cover #3 - Finishing

My last few projects have just been finished with Watco Danish Oil.  This one I wanted to try and get a bit more of a match to old Craftsman furniture, as that is the next big project I have.  I found a recipe from Robert Lang on Stickley finishes and followed it.  I couldn't find any of the finishing products in my local home centers in Canada, but easily found them at Home Depot when we were in the US.

Step one was to sand it.  I did most of the sanding as I was building the project.  I used a random orbital sander to smooth out some of the joints before I added the top.  A bit of hand sanding with some 220 grit and easing the corners with some 120 grit and this piece was ready for some finish.


Step two, an oil based finish, wipe on, wait 10-15 minutes and wipe off.  I'm using Minwax Dark Walnut.  A fresh bundle of rags and latex gloves from Lee Valley made this step easy.  The drywall scrap sits on a lazy susan.


Step three.  After waiting 24 hours, back to my favourite finish, Watco Danish Oil, Dark Walnut.  Again, wipe on, wait 10-15 minutes and wipe-off.


Step four.  Another 24 hours and time for the finish coat.  Robert Lang says to thin the shellac, but I just applied it straight from the can.  I only used one coat here, but if this piece were to going to be handled I'd do multiple coats with some light sanding in between.

\

Last step, hang it on the wall.  I couldn't dig up any hooks in my workshop, so I just put a couple of screws into the wall and set the cover on them.  It hasn't fallen down yet, but I should probably do a bit better job.  I'll pick up some kind of hanger the next time I go to Lee Valley.


I'm very happy with how this turned out and my wife has already said it's coming with us to the next house.  Hopefully that's a long, long, long ways away.

Doorbell Cover #2 - Cutting Wood

This is a pretty small project so it went together very quickly.  I dug through the wood pile and found a nice looking piece of quarter-sawn white oak.  A bit of milling on the jointer, planer, tablesaw and mitre saw and I had the basic parts.

One of the reasons I picked this easy project is that I wanted to finally try using my mortiser on a real project.  I had picked up the used Powermatic 719A mortiser a long time ago and had yet to use it on a real project.  My lovely assistant Lauren helped me cut mortises in the rails to receive the stiles.  It went pretty well, though on the first cut I thought something was wrong as I had to pull way to hard on the lever.  Turns out I'd left the depth stop tightened too low.  Oops.  After that it was just a matter of remember which handle to turn to shift the piece sideways before making the next cut.


I ran the stiles through the tablesaw with a mitre gauge to cut the tenons.  I just used the combination blade on the saw.  In retrospect I should have done a few things differently :

  1. Moved the fence back before the blade to avoid potential kickback
  2. Use a dado blade or the delta tenoning jig to get smoother tenons.
I had to clean up the messy tenons with some chisel work.  Next time I'll use the tenoning jig that I bought a long time ago and haven't used yet (there's a theme here).


After cleaning up the tenons, everything did fit together well.  Here's me testing the fit of the first joint.


I glued up the rail and stiles, and while that was drying I cut the side pieces.  I could have used mortise and tenons to join these, but just went with a simple butt joint using pocket screws instead.  No one will see this joint and it's quick and easy to make.


I clamped the cover together and then drove in the pocket hole screws.  Once that was done, I added the back sides, just glued and clamped, no screws necessary for this joint.


And every last, the top and bottom pieces.

Thursday, October 27, 2016

Doorbell Cover #1 - Project Design

I find project ideas in many different places.  Woodworking magazines and books are a great place to find project plans, I've got stacks of old ones in my workshop and the library has a good supply as well.  There are a couple of TV shows worth watching, such as New Yankee Workshop and Rough Cut.  However, most of my ideas come from the Internet.  I usually 'Google' around until I find something I like, then reproduce it in Sketchup before cutting wood.

I've been doing some painting in our house and one of the walls I painted had the doorbell that came with the house.  It was an ugly mirrored abomination that matched the rest of the decor that the house had when we moved in.  Since then we've gotten rid of just about all of the mirrored doors, the mirror fireplace and glass block wall, but this doorbell was still around.  Since I had to pull it down to paint the wall it was a good time to replace it.  Since I have a workshop full of tools, this would be a nice easy project to get back into woodworking after a long break.

But first, I needed a plan.  First, I Googled around for various doorbell covers, eventually settling on 'Craftsman Doorbell Cover' as my search :


I didn't find exactly what I wanted, but this image brought me to a Pinterest page full of doorbell covers and that's where I hit the jackpot.


The cover in the bottom right corner is my favourite, and after getting approval from my wife I was ready to go.

The website for the doorbell cover had a few more pictures of the doorbell.  I imported the front-on image into Sketchup and traced it to make my plan.  The existing doorbell could not be used, but I picked up an inexpensive doorbell from Home Depot and dismantled it to get the chime mechanism.  I measured that and sized the cover to match.  Here's what I ended up with :


For larger projects I'll make a full 3D model, going as far as to create all the joinery as well.  For this simple project I just made up this simple 2D image, and built from it.

Wednesday, October 26, 2016

Stool Build

Well, there's not much to this build post.  Once we had the plan, this was pretty straightforward. I sketched out the leg pattern, then cut four legs to size on the bandsaw.  Next I cleaned up the edges of the legs with a belt sander and put them to the side.


The legs attach to a round bottom, which then gets the lazy susan mounted to it, which supports the actual seat.  I briefly considered dove tailing the top of the legs, but decided to keep it simple and just leave them straight.  The round bottom got intersecting dados cut in it to receive the legs, I almost forgot to cut them before cutting the bottom round, but remembered just in time.


I cut both the seat and bottom round using a simple circle cutting jig on the bandsaw, then cleaned up the edges on my spindle sander.

The legs were secured to the round bottom with glue and 2.5 inch wood screws from the top.  I routed out the bottom of the seat to hide the lazy susan, then mounted it to the round bottom.  The last step was adding a stretcher on each side of the stool to tighten up the legs and provide a foot rest.  I put them at different heights to accommodate different sized guests.

I covered it with a wipe-on finish - Watco Danish Oil, natural.  Took a couple of days to dry, so it's probably time to toss that old container and get a new one.


And lastly, here's my helper trying it out :


Monday, October 3, 2016

Stool History

My first real job was as a computer technician.  I was in high school at the time and the computer shop in question was run out the owner's home.  This was before I had a license, and my Dad would drop me off and pick me up.  I worked there for a number of years, eventually buying both the business and the house when the owner was ready to retire.  After a year or two I decided business ownership was not for me and closed up the business and went back to working for someone else.  I got rid of just about everything from the business, but kept this stool.


Almost 25 years since I first started working at the computer shop, I've still got the same stool I used on my first day there.  I spent countless hours sitting on this stool, fixing and building computers.  Somehow this little computer shop managed to get the perfect stool.  It has three key features :

  1. It's the perfect height
  2. It's lightweight and indestructible 
  3. The horizontal spacers are optimally positioned to act as a comfortable foot rest
So needless to say, I'm quite attached to this old stool,  I still use it every time I venture out to the woodworking shop.  Now my kids are getting to the age where they sometimes join me in the workshop and they have been 'stealing' my stool while we are out there together.  So one day I was out in the shop, sitting on the stool doing some sanding when my daughter came out to join me.  Naturally she needed the stool as well, so she could sit and draw at the workbench.  After a brief struggle she suggested I just make another stool.  

It seemed like a reasonable request, so I picked up the old stool, spent a bit of time measuring and got to work.  First, we glued up a seat blank out of some red oak :


Next, we cut some legs :


Here's where I started to scratch my head.  First, how was I going to attach the legs to the seat, second, how about those compound angles?  I decided to use my mortiser for leg attachment, but then the compound angles had my scratching my head for quite a long time.  Shortly thereafter I bailed on the idea of copying the stool and decided to go with a new design.  

We dug way back to June 2000.  Wood Magazine #124 had a stool that looked a little more like 1990 than 2000, but looked like it would do the job.  We'll drop the brass ring and luckily enough I have a lazy susan that's been kicking around my workshop for about ten years that finally be able to put to good use for the seat!  


Tuesday, September 27, 2016

Is this thing on?

After not having posted anything to this blog in 4 years, I'll need to figure out how to post again.  Let's try a picture :


That seems to work, next story - the tale of two stools!

Monday, September 10, 2012

Lauren's Bunk Bed - Complete


Okay, it took a little less than a year, but Lauren's Bunk Bed is officially completed.  This photo was taken about 3 weeks ago, so I'll call it 11 months to completion.

After this photo was taken I also added in another piece of wood between the tall supports at the head of the bed.  This was screwed to the back of the supports, then screwed to joists in the wall.  At the foot of the bed, I drove some screws through the side of the bookcase into studs in the wall.  With these two attachment points, the bed is solid and won't be moving even when the kids are jumping and playing on top.

I'm very happy with how the bed turned out, the maple looks great finished with Watco Natural finish. The stairs turned out very nice and as you can see the bunk bed is already stuffed full of books and toys.  

On the other hand Lauren has only slept in the upper bed once or twice, apparently she prefers to bottom bunk.  I guess she is ready for future sleepovers!

Friday, August 3, 2012

Lauren's Bunk Bed - Mattress Boards 2


I found some time the other night to get a bit more work done on the mattress boards.  I ripped them all to width on the tablesaw, then laid them out to see if I had enough for the bed.  All the boards came out to about 85" and I was looking for 80" so I've got a whole extra board!  

Over to the router table and I used a bullnose bit to put a little detail onto one edge of each board, on the bottom side.  Next I sanded all the boards with a random orbital sander, 80 grit and here is the result :


One more sanding session to 150, then I'll bring them upstairs to apply the finish.  I'll probably put a nail or screw into the ends of each board and then support them between a couple of 2x4s in order to finish both sides at the same time.  

I'm hoping to move her bunkbed into the house this weekend and I think I can do it.  The last thing I have to do is to put together a safety rail, but I'm waiting on that until I get the mattress in place so I can make sure the rail is high enough.  

Originally I was supposed to have the bunk bed done for Christmas, so I'm about 8 months behind.  Lauren's okay with it though, and she's very excited about her new bunk bed.

Wednesday, August 1, 2012

Lauren's Bunk Bed - Mattress Boards

After a pretty long delay, I am back working in the workshop on a regular basis.  The cold weather always puts a damper on my workshop time and I never really recovered my enthusiasm after the weather warmed up again.

The few times I did get into the workshop were spent productively on Lauren's Bunk Bed.  I am happy to say it is almost complete and it should be finished and installed in her room this weekend.  All the major parts are upstairs in the workshop in the 'finishing' room.  The bunk bed 'top' will be finished the same as her bottom bed, Watco Natural Danish Oil.  This is my favourite finishing method, wipe on with a rag, follow up with a second coat 30 minutes later, then wipe off the excess.  Let it dry and it's done.  Add a coat of poly if you want extra protection (not needed on this bed).

Downstairs in the workshop I need to cut the mattress boards and the safety rail.  First the mattress boards.  Since the mattress boards are mostly hidden under the mattress, they'll be poplar.  I dug through my wood pile to find all the poplar.   My quick measurement shows that I should have enough - barely.


On the right are 3 more boards of curly maple that I made her bottom bed from.  I forgot I had those and they'll come in handy for the safety rails.  The boards on the left are all the poplar I had left and should just be enough to cover the frame.

My favourite way to plane lots of wood is to open up the garage door and let the shavings fly.  Once planing is complete, I shovel the shavings into a garbage bin and put it to the curb for the compost truck to pick up.  I find that the 1hp dust collector I have frequently clogs with the planer shavings so this way is much less hassle - I'm sure the neighbours love it as well.


Here is the pile of mattress boards after planing.  I chopped them to size before planing to make them easier to handle.  I'll clean up the edges on the tablesaw, use the router table to put a bevel on the bottom edge and then a bit of sanding before moving them upstairs for a coat of finish.


Friday, September 23, 2011

Lauren's Bunk Bed

I've been working on the design for Lauren's bunk bed in sketchup.  Here is the first draft :


The bed itself will be made out of soft maple, the bookshelf mostly maple plywood with a solid face frame.  At least that's my current plan...it may change.

Monday, August 29, 2011

Welland Half Iron Triathlon - June 26th, 2011


Short Version
First HIM, finish - 4:47:59.4, 34th OA, 8/38 AG.  
Average swim (for me)


Long Version
I started with Endurance Nation in the November OS, having run marathons for the past 7 years but not doing much biking or running during that time.  I've done a few sprint triathlons over the years for fun, but this was my first time training specifically for a triathlon.  The Welland HIM on June 26th was my first 'A' race of the year.
Before the race
Welland is a 4 hour drive for me, so me and the family drove up on Friday after work and checked into the host hotel.  $120/night for a nice suite with a full kitchen just across the canal from the race site.  It's probably about a one mile by road to the start, 300y if you want to swim there 
Saturday morning I took a quick 10 minute swim around the canal where the race is held.  That was my first wetsuit swim of the year and went about that well.  If anything it made me more apprehensive about the swim and I probably should have skipped it.
Welland Ontario is 30 minutes from Niagara Falls so we spent Saturday at Niagara Falls.  Both of our young kids enjoyed the Maid of the Mist boat ride and the Butterfly Conservatory.  Drove back to the hotel in the late afternoon, stopping at the race site to pick up my race packet on the way.  Take-out pizza for dinner and hung around the rest of the night watching TV.
Race Morning
0210 - 2xPC Chocolate Ultrashake at  - 470 calories
0530 - 1xSesame bagel w/cream cheese, 1xPC Chocolate Ultrashake
0630 - Rode my bike over to transition area, with wesuit and everything else in a back-pack.  Since I was one of the few fools to show up that early I got the closest spot to the Bike In/Out on my (numbered) rack.  Setup my transition area then when for a short-ride and practiced my bike mount/dismount. 
0800 - Short race meeting in bike transition area, ate one gel then headed down to the swim start.  Swim start was 450m away from transition area, over grass, asphalt & gravel.  I brought an extra pair of shoes and stashed them on the path at the swim exit for the run.  Many people did not and I passed them on the run to transition.
Got in the water and swam around for about 10 minutes before the start.  Moved towards the back third of the pack and minutes later the race started.
Swim 
Plan - Finish, maybe 40 minutes?
Actual - 37:40 - 125th OA
I'm a poor swimmer.  My arms started feeling tired after about 200 yards, but I pushed on and just kept counting strokes.  Count to 5, sight, and repeat.  I found different sets of feet to follow and tried to keep positive thoughts the whole way.  There were a little over 300 people in the swim so it wasn't very crowded.  The canal itself is probably 60-70y in width, no waves and straight.  The swim is one lap, a long rectangle so pretty much as easy as it gets in a triathlon.  
There was no clock (that I saw) at the exit, so I didn't know my time until after the race.  My RRs in the pool have been about that time so I am happy with the swim. 
After getting out of the water, I pulled off the wetsuit, slipped into my shoes and ran the 450m [2:24] to my bike, carrying the wetsuit.  Many people were running barefoot with the wetsuit around their waist - didn't make sense to me.
T1 - drop wetsuit, put on RX sunglasses & helmet, grab bike and go.  Shoes are on the pedals.  Time - 0:42, 1st OA.  I passed a whole bunch of people in transition; I couldn't believe how many people were in there and how slow they seemed to be moving.
Bike
Plan - 200 NP, no time goal - expected around 2:40ish based on RR of 2:48 (including stoplights, stop signs, etc)
Actual - 205NP, 1.02 VI, 2:30:27 - 50th OA
I was planning to go with one bottle on the bike, but took two once I saw that most people had at least 3.  I had four gels in my jersey from the start.  Took it 'easy' for the first 8 minutes and kept the watts under 200.  After my swim there were plenty of people to pass, and I started that right away.  Once in a while I found a wheel to follow for a bit, keeping legal at 5m.  Started drinking (gatorade) and pushed the watts up to 210ish after about 10 minutes.  Spent the rest of the ride passing people, probably 30-40 in total.  About 5 people passed me, but two of them came back later.  Finally found a wheel at 80km that I followed for till the end - 56 year old guy that was 21 years older than me.  I was a little under 200w for that last 40 minutes.  I was finding it a little hard to keep the watts up, which is why I was glad to stay on his wheel and save it for the run.
Bike Nutrition - Gels @ 0:45,1:20,2:00,2:20, 3xgatorade/heed@150cals
T2 - hop off bike, pull on socks & running shoes, grab hat & go.  0:58 - not first (darn socks).  Just like T1 I passed a bunch of people that were standing around.

Run
Plan - start at 7:30s and move down to 6:45s, ending up wherever - around 1:35ish (I didn't actually do the math, that was my guess)
Actual - 1:35:50 / 7:19/mile - 29th OA
After beating my best estimated bike time by 10 minutes I figured all I needed was a 1:40 to break 5hrs, so I revised my mile pace down a bit.  Since this was my first HIM I wanted to make sure I didn't end up walking.  I figured that 7:30s would get me there so I resolved to keep all my miles under 7:30.  First mile was 7:25 which included a much needed pee break, so I was off to a good start.  I walked through one aid station and then decided I didn't like walking so didn't do that again.  Temperature was perfect for the run and was 90%+ in shade and flat. Slowed up at the end, 10-12 were 7:35/44/38.  I missed some long runs in training so my run fitness was not quite all there.
I drank Heed and dumped water on my head at all the aid stations I could but missed a few as the volunteers were not ready.  I knew I was ahead of the game on fluids so didn't worry about it.  1 gel (from the course) at 6 miles.
Just like the bike I was able to pass a number of people on the run, between 10-15 would be my guess.  I did 'let' one person go by my on the 2nd loop, I didn't get his number and I'm not sure if he was on his 1st or 2nd loop. 
Finish
I was sure I was under 5 hrs but didn't know how far until I was about 50m from the finish and could see the clock.  I was very happy and a little shocked to see the 4:47.  Zipped up my jersey and crossed the line, got my medal, finisher's hat and collasped (kidding).  Drank a few cups of Heed and dumped some more water on my head, then got interviewed by the series sponsor - milk.

Results
Overall I was surprised how 'easy' the day went.  I've done 14 marathons and none of them were easy.  Since I planned on taking about 2 hours longer in this event then my marathons, I figured it would be much harder.  Never during the day did I feel that I had to walk or quit.  I felt positive the whole time.  
I am ecstatic with my finish time.  Before the race I thought 5:00 was my stretch goal, and probably 5:05 was realistic - 40m swim, 2:40 bike, 1:40 run + transitions.  After my swim 'practice' on Saturday I changed it to 5:15.  I told the family to meet me based on the 2:40 bike split, but luckily they got there early, just in time to catch me at T2.  I knew at the halfway point in the bike (1:15ish) that I was having a great day on the bike and was going to get sub 5:00.
I've done 14 marathons and only been 'okay' with one of them.  All the others I had the fitness but blew the execution.  Thanks to Endurance Nation I was able to nail the execution of my first HIM.  I told my wife after the race that I should retire now as I've had the best race I could.  
Next 'A' race - Rev3 Cedar Point HIM.
Other
FTP - 241
VDOT - 55ish, March HM in 1:22:19

Monday, June 14, 2010

Laundry Room Upgrade - Part 3

Once the subfloor preparation was complete, it was time to get the tiling done.  I don't have much experience tiling, and the tiling that I have done has been pretty frustrating, but I had high hopes for this job.  After spending a lot of time getting the subfloor nice and flat I figured that this job would go smoothly.

Well, it did.  Mostly.  Before I started I had to run out to Home Hardware to get some tile edging.  Three pieces of 8' tile edging for $50.  Once I got home I pulled the two 50 pound bags of thinset mortar out of the car that I'd bought the other day.  Read the instructions to make sure I knew what I was doing and found that I'd bought the wrong thinset.  I had unmodified thinset, which the instructions said not to use with porcelain tiles - and I'm putting down 13" porcelain tiles.  Argh.  Back to Home Hardware to buy three bags of poly-modified thinset, which they only have in 25 pound bags for $20 each, vs the 50 pound bag of unmodified I got earlier for $16 each.  Double Argh.

After mixing up the thinset, I started laying tiles.  I mixed the first batch of thinset a little thick, but the remainder went down no problem.  I think this job ended up taking me three hours.  I could have gone faster if I had someone to help mix the mortar, but I'm glad I got it finished.


Here's the completed job - a nice smooth, unbroken floor (inspector Oscar checks it out).  Hmm, wasn't there a vent there somewhere.  Oops.


After the tiles dried for a couple of days I did the grouting.  Well, first I cut out two cracked tiles and the third tile that covered the vent.  The grouting took longer than I thought it would.  First, the grout we had was the color of, well, brown.  So of to Home Depot to pick up some new grout.  After getting started late (again), it took me about 45 minutes to put the grout down.  I cleaned up my tools and got back to the floor to sponge off the excess grout. 

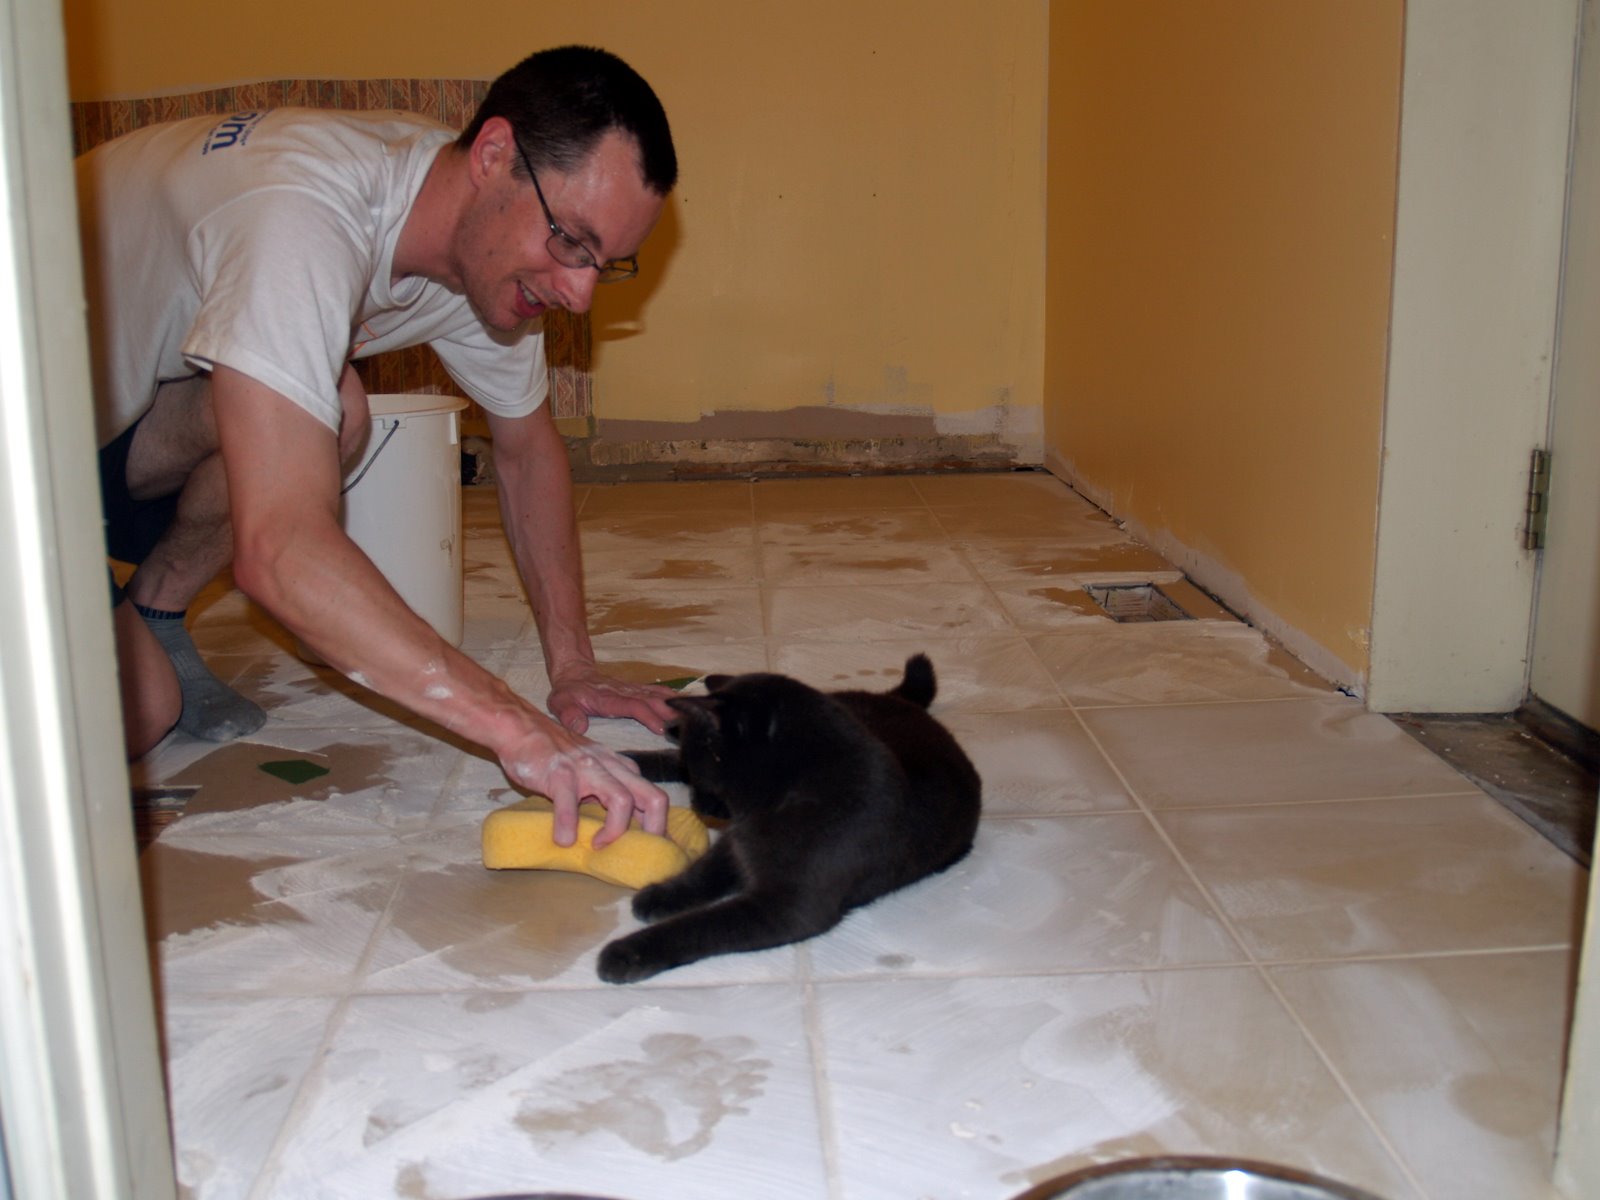
I must have waited too long to clean off the grout, because I had to scrub the floor for another hour and a half to get off all the grout.  That was the opposite of fun.  As you can see, inspector Oscar is always close at hand to make sure I am doing quality work.


Here's the completed floor.  I still need to make up a crawlspace cover.


Here's the new vent hole.  I tried plunge cutting the porcelain tile with a 4" diamond blade on an angle grinder but could not get the hole cut without breaking the tile.  After three tries I gave up and went with the below instead.

Friday, June 11, 2010

Laundry Room Upgrade - Part 2

After finishing up the drywall with four coats of drywall compound, I was ready to paint.  I started with a coat on all of the new drywall and any area that was patched.  The walls that were previously covered in wallpaper already had a good coat of primer so I left those alone.  There were a few brown spots on the ceiling where there were previously cabinets, so I primed those to cut down on the number of finish coats I'd need.  You can see one of the brown spots above my head in the picture below.


The floor was the next thing to tackle.  We'll be putting in a 13" porcelain tiles, so I need a strong, flat sub-floor to support the tile.  The original floor was : 3/4" tongue and groove planking (original), 1/2" particle board, two sheets of 1/4" plywood.  All fastened together with a bazillion nails.  I tried just ripping up the plywood and particle board, but it was coming up in fist size pieces due to all the nails.

After giving up on the 'easy' way of ripping out just the plywood, I pulled out my circular saw and sawzall and got to work.  First I used the circular saw (and a cheap blade) to cut through the floor adjacent to each stud.  Then, a large prybar and sledgehammer to pull the floor up far enough from the joist to cut the nails securing it to the joist.  A couple of hours, sweat and blood and I was able to get the floor removed and piled up outside the door.


Here is the naked floor.  A quick check with string showed me that it was bowed up to 1/2" in the middle.  I didn't want to impede on the floor space in the crawl below, so I decided to sister the 2x8 joists with some 2x6s in order to even out the floor.  With a string line stretched across the top of the existing joists to help line them up, I added a 2x6 to each of the original joists with construction adhesive and screws.  I had to notch the bottom of a couple of the 2x6s to clear wiring in the original joists.


After I finished flattening the floor, I put down two layers of 5/8" tongue and groove plywood for the subfloor - the first was glued and screwed to the joists, the second only screwed to the first layer.  On top of that I attached 3/8 fiberock with mortar and rink shanked nails.  Now the floor is ready for tile.

Thursday, June 10, 2010

Laundry Room Upgrade - Part 1

In our house, the Laundry Room and the Kitchen are the most dated and upgrade ready rooms in the house.  

The kitchen cupboards are 80's melamine with a mirrored backsplash and laminate counter tops.  The ceramic floor tiles are cracked and loose, the layout is too spread out and the walls are a dark brown.

The attached laundry room has ugly as heck wallpaper, awkwardly sized home made cabinets of dubious quality and a wavy vinyl floor.

This year's major house renovations will be to completely redo the kitchen and laundry rooms.  We'll start with the laundry room - once it is fixed up I'll setup a temporary sink in there and tear apart the kitchen.

First, a few before shots of the laundry room.  Nice wallpaper!


I had hoped to tear out the cabinets, strip out the wallpaper, the patch and paint the walls.  Unfortunately I found a surprise when I tore out the cabinets - part of the wall was cinder block.  The remainder of the wall was plaster directly attached to the cinder block which is beyond my skills to replicate.  Parts of the cinder block were on the same plane as the plaster in the adjacent wall (to the right) so there was no way I could just add drywall to cover the cinder blocks - I'd have to cover the entire wall with drywall.


Finishing drywall is definitely not a skill I've mastered very well so I knew this would be a bit of a challenge.  I called a guy who's done some other drywall work for me but he decided to retire from drywall earlier in the month so I was on my own.  I started by strapping the walls with some 1x3s, using construction adhesive and screws to attach the strapping to the plaster.

The ends of the 1x3 were attached to the cinder blocks with a powdered actuated fastener (Hilti DX 36).  I used cedar wedges to fur out the 1x3s on the cinder block so then lined up with the strapping on the plaster.


Once the strapping was in place, it was time to add the drywall.  Two sheets of 4x10 1/2" drywall covered this wall, I needed one other 4x8 sheet to cover up some plaster on the opposite wall.

I scoured the web for about an hour to brush up on my drywall finishing knowledge, here's a few sites I liked :

After the drywall was hung,  Joshua gave me a hand taping the joints.  I used paper tape for the flat seam and preformed metal corner beads for the corner and ceiling.


Here I am finishing up the first coat of mud.  It took me another three coats to get everything smooth enough.  Not a perfect job but good enough for the laundry room.  I definitely need to find (competent) help for the kitchen drywall job.

Tuesday, February 9, 2010

Wood Delivery

Before :
 
After :


I needed some Red Oak to finish up a couple of door frames in the house.  Since I had to get the wood delivered I added in White Oak and Poplar as well.  My wood rack is very full now.  I had to stash the last 8 boards of White Oak upstairs in the loft.
  • 100 board feet of Red Oak
  • 50 board feet Quartersawn White Oak
  • 40 board feet of Poplar
Now if the weather would warm up I could get out to the workshop and build something with the wood!