Friday, October 30, 2009

Craftsman Ottoman - Part 7

Now that all the parts are ready for assembly it's time to sand and glue this project. I used my random orbital sander to sand all the parts with 120 than 220 grit paper. Four or five passes on each side is usually enough to smooth them out. Another pass or two on each edge to round over
the sharp edges and then it's time for assembly.

Here is a dry fit before final gluing one of the sides to make sure everything will go together.


Finally, one of the sides glued up and waiting to dry. After assembly I found it was not quite square, but a little pressure from a diagonal clamp and it was good. Getting all the vertical slats glued and lined up was a little tricky but everything went together okay.


The long rails on the sides need a support on the inside. The cushion will rest on top of these supports when the stool is complete. I left out the screws called for in the plans and just glued these in place.


Once the glue dries on the sides and the long rails I'll be ready for final assembly.

Thursday, October 29, 2009

Craftsman Ottoman - Part 6

I used my Performax 16-32 Drum Sander for the first time on a 'real' project. The sixteen vertical slats of the Ottoman are 3/4" thick. I ripped them at about 7/8" from 3/4" stock, then ran all the pieces through the drum sander to remove the saw marks. In the past I've done this with a random orbital sander which is more time-consuming and less accurate. The drum sander worked great.

After sanding I cut the tenons on all the pieces to match the holes that I drilled in the rails. I then used a chisel to round over all tenons to match the round holes in the rails. You can see the one I've done in the picture below. It took about 30 minutes to round over all the tenons and do a little light sanding to remove the sharp edges.


Next up were the long rails. I cut the tenons the same as on the side rails, rounded over the edges with a chisel and did a quick dry fit to make sure they were okay.


The legs have a four-sided bevel on top. I used the mitre gauge with a stop block to cut the 15 degree bevel on the top of each leg.


Almost done now. Just the bottom stretchers left to cut and then sand and glue it up.


Wednesday, October 28, 2009

Craftsman Ottoman - Part 5

After cutting the mortises in the legs, it was time to cut the corresponding tenons in the top and bottom rails for the sides of the Ottoman. When I cut the top and bottom rails I kept some of the scrap wood from each rail, about 5" long so that I could use the scrap for test cuts. This way I could 'sneak up' on a tight fit for the mortise and tenon joint. If I raised the blade too far and the tenon was loose I just cut the end off the scrap and try again.

Each tenon is 1 1/4" in length, so I set the fence of the tablesaw at 1 1/8" to account for the thickness of the saw blade. The fence is set back from the start of the blade to prevent the wood from getting jammed between the fence and the blade. I have a Osborne EB3 Miter Gauge that I hold the rail against and then make the shoulder cuts on all four rails.


For the cheek cuts, I used a tenon jig that I created for my unifence. It's a simple jig that rides on top of the fence. The rail is held vertically against the stop and run through the blade to remove the outside of the tenon. The blade is raised up to a hair above the cheek cut and two passes are made for each rail end. As with the shoulder cuts, I first used the scrap stock to get the tenon width correct.


The last power tool step is to remove the edges of the tenon on the bandsaw. The mortises in the legs had rounded edges because I cut them with the router, so the last step needed to be done with hand tools. I used a chisel to round over the edges of the tenons so they fit snugly into the legs. A dry fit shows the ottoman is coming together.


The rails need mortises for the 8 slats in the sides. I decided to cut these with the drill press rather than making up a new jig. I clamped the rails together and marked the center point of the mortises.


Over to the drill press where I used a 1/2" brad point bit to drill out the 8 holes necessary for the slats.


Monday, October 26, 2009

Craftsman Ottoman - Part 4

The last time I made legs like these with mortises for the rails, I made up a custom jig for my router to cut the mortises. I used a 3/8 spiral bit and a template guide in the router. The jig worked well but was time-consuming to make and to use. Each mortise had to be cut in three steps - each cut deeper than the last. In between cuts I had to manually vacuum out the mortise as the dust collection attachment did not work with the template guide in my router. When switching legs I had to clamp and unclamp the template to each leg.

This time I decided to try using the router table and two stops to cut the mortises. By using the router table I could save the time of creating the jig, clamping the jig and cleaning out the mortises by hand.

I installed a 3/8" spiral bit in the router, then set the distance from the fence with a test piece to get the mortise centered in the 1 3/4" leg. I then clamped two stops on the fence to set the start and end of the mortise. After checking on a test piece I was ready to go.

First, I carefully marked all the legs to make sure I cut the mortises in the right place. With the router turned on I lowered each leg onto the bit, keeping the leg pressed tight against the fence, then moved the leg back and forth between the stops.

After cutting all four legs at the first depth I moved the router up to cut deeper and repeated the operation three more times until I had all legs cut to the full 1 1/4" depth.


This 3/8" Up Spiral Router Bit has cut a lot of wood and needs to be replaced or sharpened.


The first mortises I cut were for the bottom rails, 1 1/4" in length.


Each leg got three mortises cut. I was all four legs after about 45 minutes. It was much easier to cut the mortises on the router table than to make a custom jig.

Friday, October 23, 2009

Craftsman Ottoman - Part 3

A little bit more progress on the Craftsman Ottoman.

After removing the legs from the clamps, I ran them through the tablesaw to cut off the excess veneer. The finished size of the legs is 1 3/4", but I since they are glued up out of 1" boards, I had plenty of stock to remove after gluing. When I glued the veneer I had both pieces overhang one edge so the other edge would remain square.

After the tablesaw I ran them through the planer and trimmed them all down to 1 3/4" square.


I am very pleased how they turned out. The veneer will hardly be noticeable once I ease the edges.


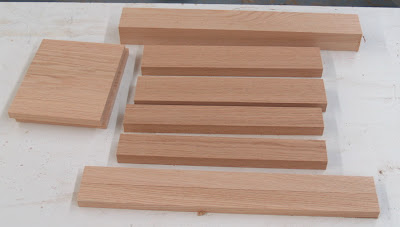
I also dug through the wood pile to find wood for the rest of the parts I needed. I jointed, ripped, planed and crosscut all the parts to size. The wide board on the left will be the spindles.


I need two more parts - the shelf and the shelf supports.

The last thing I did was setup my router table to start cutting the mortises in the legs. I'll get that done next, then cut the tenons on the rails with the tablesaw.

Thursday, October 22, 2009

Craftsman Ottoman - Part 2

Back to work on the Ottoman. I sliced up the veneer for the sides of the legs. I was able to easily get four ~3/16" pieces from the 1" board. In between slices I ran the original board through the planer to smooth out the next piece.

For the first cut I marked the line with a pencil and straight edge, for the remainder I eyeballed it and with the help of my resaw fence I was able to get reasonably consistent pieces.


After the resawing was complete I cut the legs to size. The finished size will be 1 3/4", so I trimmed them down to a little more than 1 5/8". After the sides are glued on, they'll be planed down again to get to the final 1 3/4" size.


Lots of glue and the legs are all clamped up. I could have saved 2 hours by just buying 8/4 stock. Maybe next time...

Wednesday, October 21, 2009

Craftsman Ottoman - Part 1

After finishing my latest marathon I'll be taking a month off from running and so will have some time to get back into the workshop.

The first project I'm working on (after cleaning the workshop) is a Craftsman Ottoman. I've already built two of these. The first one I gave away, and the second one which should have stayed with the Morris Chair has been stolen by Rosemary to use on the balcony.

Since I have some vinyl leftover from the Morris Chair project I decided to put together another Ottoman to keep with the Morris Chair. Since it requires less than 7 bd feet of Oak and I already have the plywood for the cushion it won't cost much and will be 'quick' to build. I'm hoping to use up many of the smaller pieces of wood floating around the shop as well which will help clean up the workshop.

I got started this morning by gluing up blanks for the legs. I don't have any 8/4 Oak, so I jointed and planed down some 4/4 Oak, then glued them up for the legs. It took me about 45 minutes to get from the 'find the wood' stage to the 'all glued up' stage.


The piece of wood I selected to cut for the glue ups was 4 3/4" by about 8' and the legs blanks are 16" long. After cutting out the wood for the leg blanks, the leftover piece will be resawn into 3/16" slices to cover the glue lines on the legs.

When I built the other Ottomans I did not have a bandsaw and had to use the tablesaw to resaw, which wastes ~1/8" for the blade. I now have a 14" Ridgid Bandsaw with a 1/2" resaw blade and I will be able to 'save' money by using less wood when resawing :)

Of course I had the wrong blade on the bandsaw so I had to switch over to the 1/2" blade and spent another couple of minutes adjusting the bandsaw to fit the 1/2" blade. Once I had it up and running I ran a few test pieces through and had no trouble resawing down 1/8".

Before I finished I had enough time to cut one slice from the 4 3/4" board that should provide all the veneer for the legs. I need four boards from this one piece of 15/16" and have high hopes that I can get it with the bandsaw. After each slice I'll run the remaining board through the planer to square it up.

Tuesday, October 20, 2009

Detroit Marathon

I ran the Detroit marathon on the weekend. Lauren and Mommy didn't come along at the crack of dawn to watch me race, but Lauren was happy to see me when I got home.